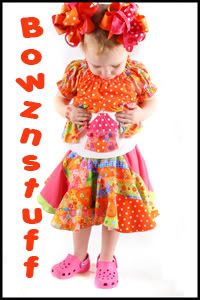
And the second is for all those Fancy Nancy fans out there - I am so excited about Fancy Nancy's dress! Talk about fancy - the set includes the peasant top, the twirly whirly skirt, the cute apron, the flower belt which can be worn with other outfits too just like Nancy and a corsage! Plus I have also listed a mega fancy bow and clippie pack! And do you like my Fancy Nancy Hair? I'll post some instructions soon to show you how to do a Fancy Nancy Hair style! Click here to see the outfit and here to see the hair accessories.


And to celebrate Sugar3 are giving away some Sugar Bucks - $40 is up for grabs for any bid placed on a Sugar3 Auction. Click here to see all the fab goodies.

Oh and also I just have to point out this FAB Cinderella Bowznstuff resell - a OOAK and what a fabulous opening bid!
 So now onto the new do! You might remember my obsession with the side pony - well it continues! but I've fancied it up a bit. Start with a t-part - sectioning off the front of the hair but rather than a middle part, do a side part like so. I have put the back section of the hair into an elastic to keep it out of the way.
Next up start with the front part of the hair on the side where there is the least hair and make a part and create two mini ponies.

Then move over to the front part of the hair where there is the most hair and pop that up into a high side pony - this will form the base of your style.

Now working your way around the head - working with the back section of the hair, continue parting and making little mini ponies right round the head - the size and number is totally up to you.
 Now the next part could be done with or without twists, it could also be done with corkscrews or braids - totally up to you. Because Hettie's hair is curly I need to do twists in a style like this because otherwise it would just all burst out. Twist each pony and secure it into your high side pony. I used the little coloured elastics to secure each mini pony so I could cut them out easily and then put one stronger elastic over the whole thing for an all day hold.
 Pretty cute hey! Later on we popped in a bow and boy did it look nice!


 Posts
Posts