Showing posts with label pigtails. Show all posts

Sunday, February 1, 2009

Upstairs Downstairs and a voting plea

Before I begin with my upstairs/downstairs mismatched ramblings might I call on a favour. I have been nominated for best girls design on the Boutique Buyers Blog and well...um could do with a vote or two. So if any of you wouldn't mind popping over here and leaving a comment saying that you vote for Bowznstuff that would be FAB!

Speaking of fans...excuse my lacklustre segue, if you are a Bowznstuff fan it will come as no surprise to you to know that I am a big fan of the mismatched!
Mismatched straps


...mismatched legwarmers...


bows mismatched on every loop


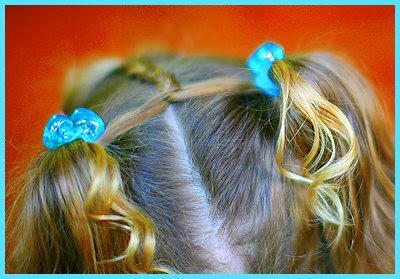
Ah yes I love a good bit of mismatching me! So mismatched hair...hey why not. I LOVE this style - one of our staples...sort of a cross between an urchin and Orphan Annie - without the red curly hair, obviously. And its simplicity is stunning. Simply part the hair in the centre and do one high piggie and one low. I must warn you that there is an not insignificant risk with this hairstyle, so be sure to make the difference fairly obvious lest someone think you just can't get your piggies even - I often use mismatched bows just to add....well a spot of mismatchedness!


Sunday, November 30, 2008

New Hairstyle, new Bowznstuff

Well Bowznstuff officially closed for the holidays today - how exciting is that!? Well for me at least. So that means time for some holiday preparations, a few lunches with friends and some more blogging :) Tee hee - today I put the last finishing touch on the last outfit and it is all going out tomorrow! Yipppeeeee! We even had to squeeze in a last minute dance costume but it is all finished now! So to start with...new hair. Something nice and simple, pigtailsl with tiara.
Start with a centre part and then T-part the front.

Place the back part into pigtails. Then take one side of the front of the hair and twist it toward the head. Keep twisting until you are underneath the pigtail. I secured it tempororaily with an alligator clip. Repeat with the other side and then secure the two together with an elastic - isn't that pretty? I like that it looks like a tiara -its fun, simple and easy to wear for everyday - doesn't take much more time that normal piggies.


And in sewing news I had just enough time for one last Bowznstuff one of a kind. The fabulous Feliz dress by Nancy Langdon - with just a little bit of applique! You can see more
here and the bows at a .99 cent start here. The Baker's hat is a free download from here

Saturday, October 4, 2008

Curl Chronicals, fun on the farm and some corkscrews.


So today is the last of the curl chronicals while I take a little break and wait for some new tools to try out to arrive. The methods I've covered so far are
1. Rag curls - which produce just fabulous spirals - really really great. And the best part they are super cheap - they ain't called 'rag' curls for nothing. On the topic of the rag curl, check out these little curly tops here.
2. My 80's hair devices - produce fabulous curls but unfortunately have not been seen since cira 1986.
3. The foam curler - produce a nice soft bouncy curl, not so spiral like but with lots of bounce.
4. The traditional foam roller, again a nice soft curl.
5. The twirlie.

Those of you who are fond of making little worms in hair will know the twistie well. WARNING - these twisties can result in an almost out of control frizz if not approached with caution. I just did one in Hettie's hair - quite a think one - you could easily make it twice this amount of hair. you can see how it came out, almost like a dreadlock. But they are easy to do and all you require is an elastic - soft thick ones work best. Just grab your hair - damp hair as always works best - and start twisting and twisting until the hair doubles up on itself. Once it is well wound up, secure with your thick elastic. Keep doing these all over the head and in the morning - you WILL have curls!
This is what it looked like once it had just been taken out.

And here it is separated out a bit.

We are just coming to the end of a 2 week school break and we've been trying to get out and about a bit, enjoying the better weather - here in Australia we are coming into a beautiful Spring. On Wednesday we headed down to my Aunt's farm to feed the....ahem Alpacas!

Here is my Aunt with the kids


And enjoying some Farm Fun!

And finally a lovely simple but very effective do. I could have added this to my pigtail challenge. Start with 4 ponies - two bigger ones at the back and two smaller ones at the front. Wet the two front piggies with a water spray and start your corkscrew. Divide the hair in half and twist both halves in one direction. Then wind each of these twists around each other in the opposite direction. Secure with an elastic. Then criss cross your corksrews over and use elastics to secure them into your piggies. Or you can be like me and live on the edge and not secure your corkscrews before you put them into the piggie. Two messy piggies and you are done. I really really like the look of this - it fulfills all my requirements - looks special - ie not your everyday hairstyle. It has a lovely line. And it looks sort of Princessy.

Sunday, September 14, 2008

Ballet Hair and Cupcakes

Zuerst eine neue Frisur. Wieder was für Ballet - nicht so komplizert aber trotzdem schön. Und heute meine Küchlein. Ich gebe zu, ich backe nicht so gut. Aber ich bein ziemlich stolz auf meine Küchlein. Ich habe insgesamt 24 gebacken aber ich hatte nur genug Formen für 12. Also die ersten 12 sind schön geworden aber die anderen - also so schön waren die auch nicht aber ich meine sie haben besser geschmeckt, weil sie viel mehr Glasur darauf hatten.


So first up a new ballet do.


Start with a T-part and two piggies - BUT leave some hair free around the nape of the neck.


Then twists into piggies.


Then you can do two buns with the piggies and take the hair you have left free and twist it up the back of the head an secure either with a bobby pin or something a bit more decorative.


Because this was a ballet do I added hair nets and lots of pins. And of course lots of sparkle and decoration but if you werent' going to ballet you could leave the nets off and make it more of an up do.


Also today some cupcakes - I know, I know cupcakes are such blog fodder - I have resisted them up until now - plus I'm not very good at making them. So anyway I wanted to make 24 but only had one cupcake form so the second 12 I just put in their patty pans straight on the baking tray - by the time they came out they were like one big cake and I had to sort of cut them apart. So here are my "perfect" cupcakes and then below that my other ones - they reminded me of a post dear Nancy made about blogs and photography and altering your view - well my flat cupcakes are not I suppose "blog worthy" but I like them better - for one thing you get way more frosting with them!


Friday, September 12, 2008

Pigtail challenge summary

So last week I set myself a little pigtail challenge. I was allowed 4 pigtails (exactly) and the style had to be fast, easy but still cool. it was a great exercise for me to see how many variations are possible and it was lots of fun to have specific guidelines so I will definitely do it again...just need to think up some new guidelines. Any suggestions gratefully recieved. I nowhere near exhausted all the possibile variations on these styles. So my last pigtail style is a bit hard to see but I did pull throughs on the little piggies at the front and then did high braids for the back two piggies. By the end of the day it had fluffed out nicely and looked very 50's which pleased me no end!

Here is the last style and then below a summary of all the pigtail challenge styles. If you want to go back and see all the styles just click on pigtail challenge over there on my labels in the sidebar.

Thursday, September 4, 2008

Pigtail challenge - day 3 & 4

I had a dinner engagement last night so I missed posting day 3 of the pigtail challenge. So here is day 3. Start with the 4 ponies as laid out in the challenge. Once again I did 2 small ones at the front and 2 bigger ones at the back. Divide both the little ponies in two. Two smaller sections in the middle. Combine the two smaller section so that you effectively have three strands to braid. Braid back toward the bigger piggies and when you get closer, split in half again and attach into the big piggies with elastics. Fulfills all the requirements - simple, quick but still super cool!


And day 4 I decided to reverse things to shake it up a bit. I stuck with the same config of piggies - two smaller ones at the front and two bigger ones at the back. Rather than adding the little piggies into the bigger ones as is the general way of doing things, do the opposite. So take the bigger piggies, cross them over and then elastic them onto the two smaller piggies at the front. Because of the size difference you will find the the elastics won't overlap but it results in a cool criss cross look. And I love the funky piggies at the front of the head. This would also look fab with messy piggies.

Tuesday, September 2, 2008

Pigtails day 2 and Bowznstuff - the studio!


Day 2 of the pigtail challenge! An oldie but a goodie - narrow T-part - two big piggies at the back and then two twists leading into either pigtail - secure each twist with a second elastic. Fulfills all my requirements - 4 piggies, quick and simple but still cool. :)

Heute war der zweiter Tag der Herausforderung - einfach aber trotzdem cool!


I have been meaning for the longest time now to post some photos of my sewing space makeover. So without further ado I give you - Bowzstuff behind the scenes! This is where I sit..

Ich wollte seit lange meiner neuen Nähecke zeigen. Hier sitzte ich mich hin....

This is my fav red polka dot lamp and super cool furry sewing basket!


Hier meine gepunkte Tischlampe und Nähkorb.


My fabulous Bowzsnstuff sign is from none other than the fabulous Kathy - did your really have to ask! Notice how she painted Hettie for me!
Mein Schild hat meine nette Freundin Kathy für mich gemalt. Das ist natürlich Hettie und die trägt eine Erdbeerkombi von mir!


As I have neither time nor inclination to actually do homework, I bought this lovely book instead!

Statt Hausarbeit eigentlich zu machen habe ich dieses schöne Buch gekauft! The view from my main machine.

Der Blick von meiner Hauptmaschine.

Other bibs and bobs

Andere schöne Sachen...


And finally, the machines :)


Und schließlich, die Maschinen. :)

Monday, September 1, 2008

Pigtail challenge

When Hettie was a baby she had no hair for such a long time. See look at this 18 months and a very hopeful pony!I was SO super excited when she finally grew enough to put pigtails in that I promised myself that she would wear pigtails everyday until she refused. I did pretty well but I did end up breaking my own promise, not because she didn't want to wear them anymore, just because I like to try something new now and again - BUT piggie tails remain very dear to my heart and I know she won't wear them forever, so best make the most of them. And so the reason behind my own personal challenge. For the next 5 days I have set myself the following rules.
1. I have 4 piggie tails to play with.

2. The hair styles must be simple, quick but nevertheless, a bit funky.
And for my first style- piggie tails with a knot. Instructions - start with a narrow T-part. Pop the hair into two mini piggies. Pop the bulk of the hair into two traditional pigtails. Knot the mini piggies and add them into the big piggies - nothing new but fulfills my requirements - quick, easy, but still cool :)


Als die Hettie klein war hatte sie lange Zeit keine Haare und ich habe mich so sehr darüber gefreut, als ich Zöpfe machen konnte. Ich habe mir sogar selbst versprochen, daß sie jeden Tag Zöpfe tragen sollte. Das Versprechen wurde natürlich gebrochen aber Zöpfe sind mir immer lieb. Und deswegen gibt es diese Woche eine Herausforderung für mich und zwar Haarzöpfe. Zuerst die Regeln.


1. Ich habe genau 4 Zöpfe zur Verfügung.
2. Die daraus stehende Frisur soll schnell und einfach aber trotzdem beeindrückend sein.
Oben mein erster Versuch!


Tuesday, August 5, 2008

How to do Ballet Hair and Cindy Brady corkscrew twist pigtails


Lots to report on today! First up a new tutorial on another ballet style but on the way to it there are several cute possibilities for everyday styles.


Start off with a T-part at the front so that you have two sections left loose - these will form the twists. The centre part the back section of the hair and do two high piggies.


Now you are going to do twists with the front section. Brush the hair neatly off the face and then start twisting inwards. Once you get just past the elastic of the piggie, stop and secure it onto the pigtail with an additional elastic. Now you could stop there, twists with piggies - pretty cute hey!


Now this would work just as well with braids but today I am going to do what i call a rope but I think the other name is cooler - the corkscrew! To start your corkscrew divide the pigtail into two sections and one at a time twist each section IN THE SAME DIRECTION. It may take a little practice to hold onto one while you twist the other, but after a while its a cinch. Now the trick of the rope/corkscrew is to twist the two sections in the OPPOSITE direction to the one in which you twisted your two sections. So if you twited the two sections to the right then you must wind the two around each other to the left - otherwise you will unravel. I find a handy hint here is to keep a firm hold of the bottom of your two individual twists and just keep passing them over each other. At first it will look a bit messy but as you keep going it will start to twist up nicely. The temptation is to move your hand up to the top of the piggie in order to get a nice neat twist but when you do this the danger is that your individuals will unravel. Once you get to the bottom, keep on passing over so you really wind our corkscrew up. That way it has a bit of flexibility when it works it way out a bit when you put your elastic on the bottom.


So there you go, another cute style - twists into piggies with corkscrews!


However it was ballet today so time for a ballet style. Again this would work really well with braids. Take one piggie and place it on top of the head, winding it over the top and under the piggie on the other side. Depending on how long the hair is you might be able to go for a few wraps. Hettie's only just reaches round the other piggie. Repeat with the other piggie but this time go under and over the piggie on the other side. Secure with bun pins or bobby pins will work for this too.


Now as Hettie's hair isn't all that long, it looked a bit messy in the middle - this doesn't happen with longer hair as you have more hair to fill up the hole. However, as all good hair people will tell you, when faced with a little messy bit, the best solution is disguise! So I popped a bow right in the middle and it now only hid the messy middle but looked cute too - a win win!


Hettie wore her hair in with the piggie tails down today and I rediscovered on of my most coveted items as a child. Seeing that I make bows I don't buy very many store bought accessories for Hettie. However when I saw these I couldnt' resist - we called them bobbles when I was little and oh how I wanted some. A girl in my class had an entire colour range and every day I would look at them and wish wish wish I had bobbles too! I must say I am loving them with this twisty piggie hair style - takes me straight back to the 70's - very Cindy Brady esque!